Amiga emulation
How to run the original Magnetic Scrolls releases for the Amiga
A mature Amiga emulation package is UAE and today most (all?) Amiga emulators that are activly maintained are based on UAE. While the original UAE development seems to have stopped, there is the Windows port WinUAE which seems to be the most feature-packed version today and there are several more or less active descendants. A very nice multi platform fork of WinUAE is called FS-UAE. It is not as advanced as WinUAE, but has everything you need for playing the Magnetic Scrolls games and runs on all major platforms. This guide will show how to set up FS-UAE, but setting up WinUAE should be very similiar.
Like most other emulators, FS-UAE uses images files containing the contents of the original game disks. The image files normally have the file extension adf. If you are trying to preserve your original disks as accurate as possible, you might need files with the extension ipf. Fortunately, these are supportd by FS-UAE out of the box. To create adf images there are several options, some of them require original Amiga hardware, some try to read Amiga disks directly from PC floppy drives (doing some magic). A good overview to the available options finds here. I myself read my Amiga disks with the full version of disk2fdi without problems. Of course, you could also try your luck in the internet. As long as you have an original package of the game, downloading an image should be ok.
The emulator requires a least a so called Kickstart system ROM. To really work with the emulator and for example install games onto an emulated hard drive, you will also need a so called Workbench disk. All the Magnetic Scrolls game work with Kickstart 1.3. If you still have a working Amiga, you can dump the ROM and workbench disks to image files directly on your Amiga. The required tools and a guide are available here. If you don't have your Amiga anymore or would be happy to get ready-to-use image files, fortunately these can be bought legally from Cloanto. The smallest package called Value edition is available for about 10 Euro and includes Kickstart 1.3 and Workbench 1.3. Occasionally, some of the ROMs are contained on computer magazine DVDs, e.g. issue 26/2013 of the german magazine c't had the Value Edition included.
If you have all the files available, setting up the emulator is easy: First extract the FS-UAE archive to a folder on your harddisk. Most notably your folder should contain a fs-uae executable - the actual emulator - and a fs-uae-launcher which is used for setting everything up. Start the launcher. You should see something like this: (screen shots are taken from the Mac version, but should look almost identical on the other platforms as well)
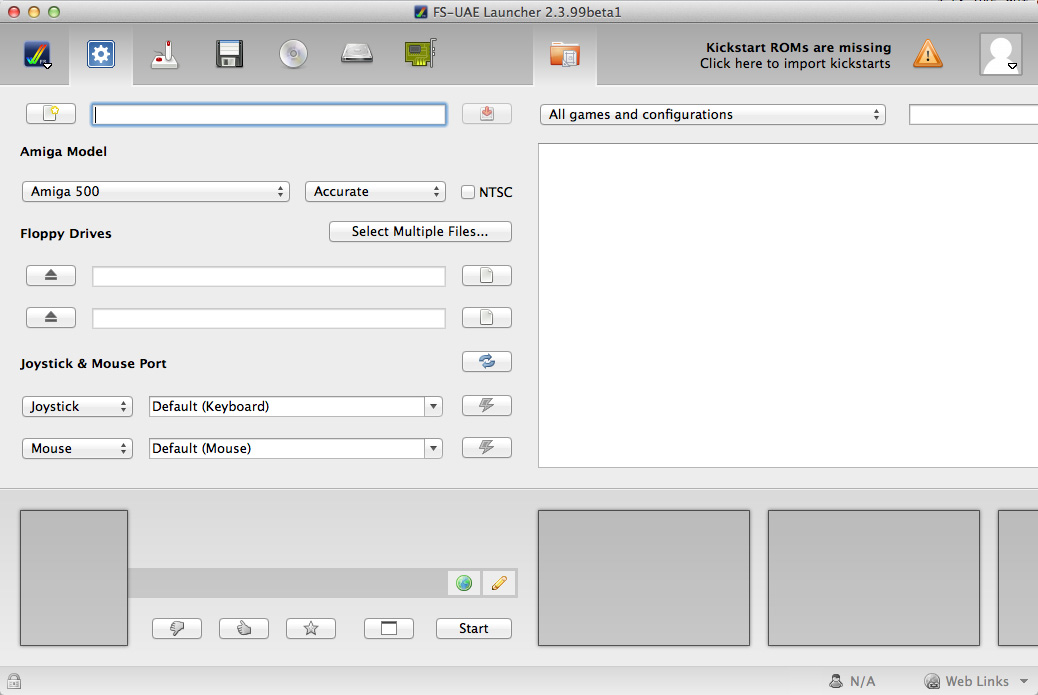
Somewhere on the top of the window you should see a message saying that Kickstarts ROMS are missing. Click the message to open the following screen:
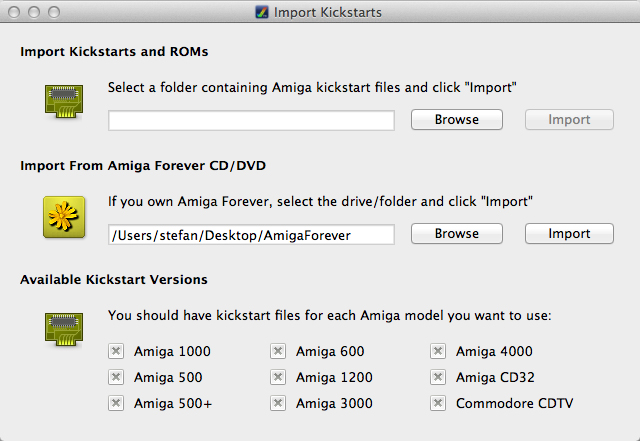
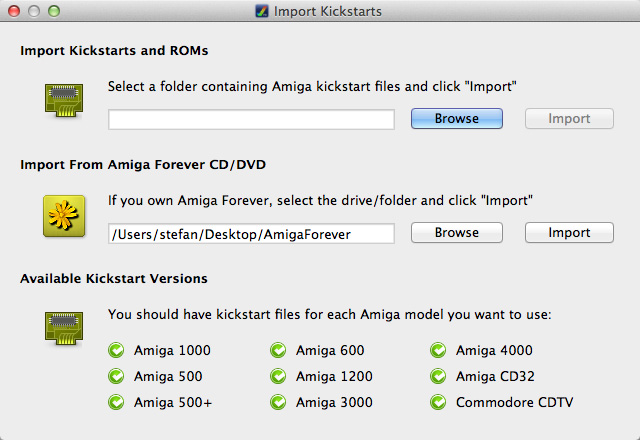
Browse to your ROM folder and click the Import button. If you have self created your ROM files or if you have them organized in your personal way, you should use the topmost option. If you have the Amiga Forever collection you can use the second option and just select the root folder. When clicking Import a progress dialog is openend and after closing the dialog you should see at least one available Kickstart version. If you use self-created ROMs or the Value Edition of Amiga Forever, most probably only one or two Amiga models are available (Amiga 500), if you have the Amiga Forever Plus collection, all machines should be selected:
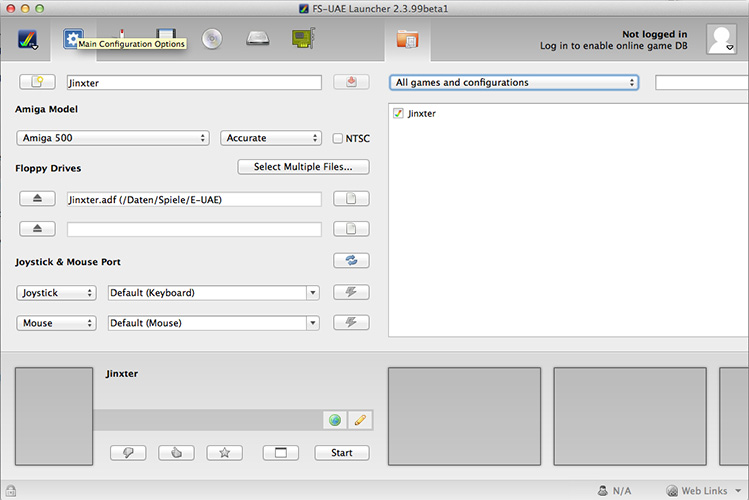
Close the Kickstart dialog and open the main configuration dialog (should be openend by default). To play a classic Magnetic Scrolls title, you are almost ready to go (for Wonderland and the Magnetic Scrolls Collection please refer to the next block). In the configuration dialog, enter a name for the configuration - here it is named just "Jinxter". In the Floppy disk section enter the path to your game disk image - here Jinxter.adf and click the configuration save button (with the small red arrow besides the configuration name). Now you ready to go. Click the Start button at the bottom and watch FS-UAE starting up:
After a short waiting time you're ready to play. Some of the games like The Pawn boot directly into the running game, others like Jinxter boot to the workbench. In the later case, click the icon to start the game:
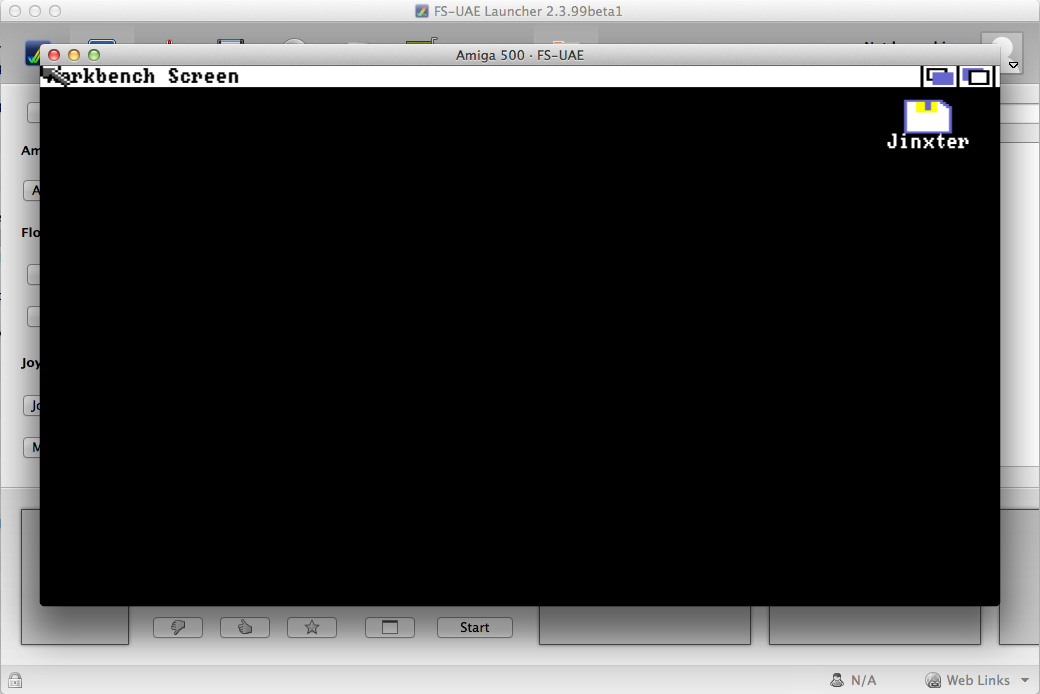
And there you are...

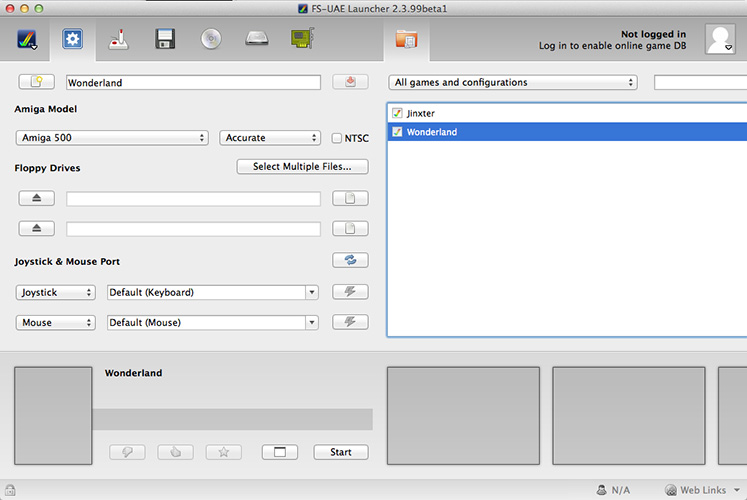
For playing Wonderland or the Collection we have to do a little bit more in the configuration dialog. Switch to the main configuration dialog and create a new configuration - here for Wonderland - and clear the Floppy disk section:
Next, switch to the floppy configuration page and add all disk images of the game to the Media Swap List:

Double-click the first disk image of the game so it gets mounted to the first floppy drive (df0):

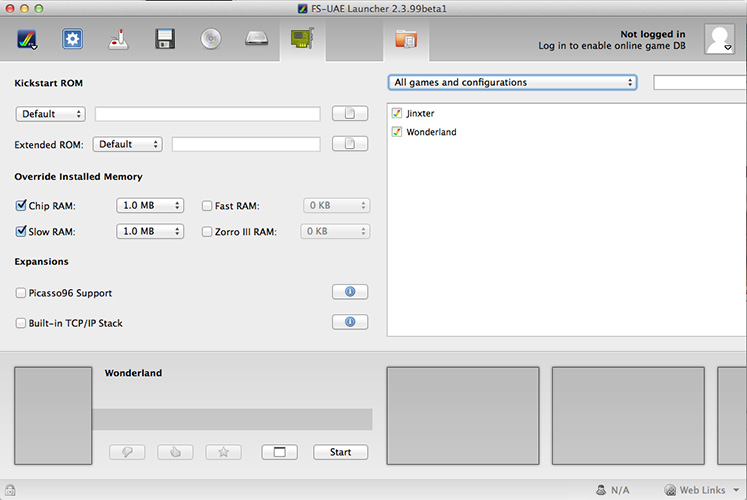
The Magnetic Windows games need at least 1 MB RAM, so we have to upgrade our virtual Amiga a little bit. Move to the System configuration page and change the Memory section to have at least 1 MB (all memory types combined):
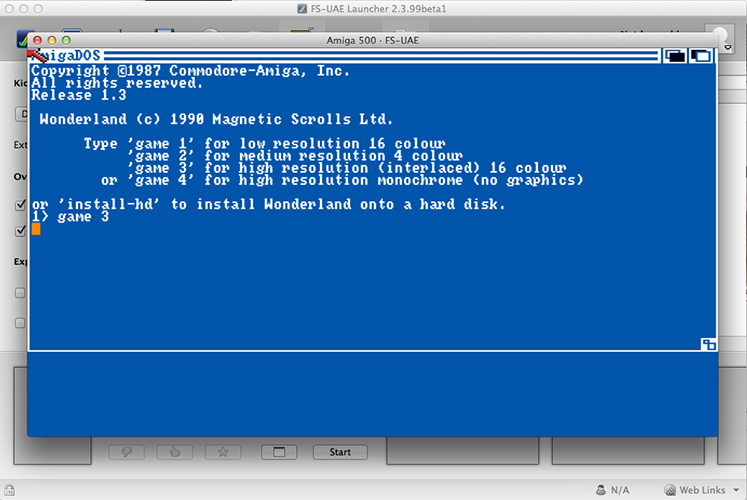
Finally save your configuration and start the emulator. After while you should see the following screen which asks for one of four possible game configurations to start. These configurations differ in screen resolution and colour depth. To start the game in high resolution with 16 colour graphics type "game 3" and press Enter.
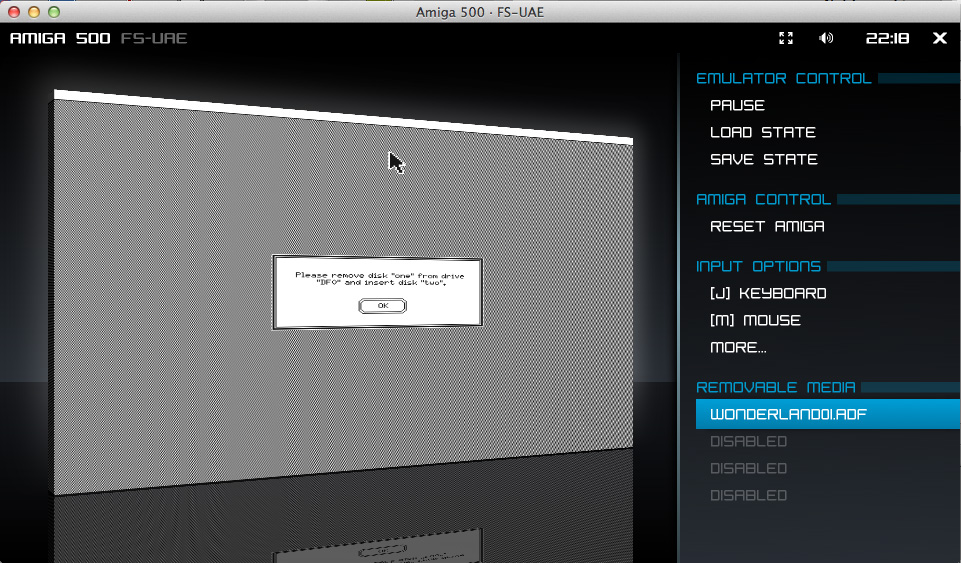
After a while the game will request the next disk to continue...

Press F12 and select the first entry in the Removable Media section in the menu on the right side by pressing Enter. Now you can switch to disk two and close the configuration menu with F12 (OSX users: If you have problems with accessing the menu please refer to the hints below!)
And there you go. For a better gaming experience I highly recommend running the multi-disk games from a virtual hard disk. Please refer to the hint section below for installing Wonderland or the Collection onto HD.
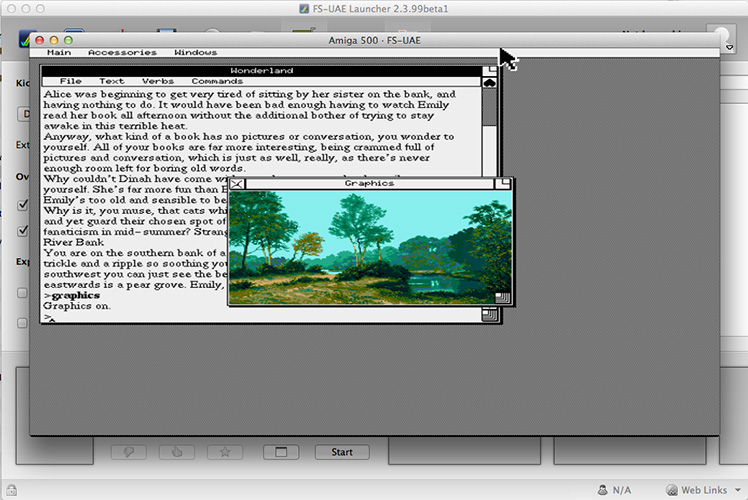
And just in case you did not notice: Have you tried the full screen mode?
Hints
If you have trouble with using FS-UAE because auf non-working keyboard shortcuts:
To release the mouse cursor from the emulation window press the alt
key and the left mouse button.
If you are using an Apple keyboard you might encounter the problem that most FS-UAE keyboard shortcuts are firmly
bound to the F12 key, however this key has special system functions attached (volume control) and never gets through to FS-UAE. While there are mentioned
some alternative keyboard shortcuts on the FS-UAE support pages, none of them worked with my Yosemite system. If you have this problem as well, you might
consider one of the following workarounds: The simple one is: disable the special functions in the system control panel. You should have something like
"Use the F keys as default function keys" in the system control panel for the keyboard. Since I never used the special functions this was my
preferred solution. The fancy one: If you use the special keys frequently, perhaps you want to take a look at Karabiner.
Both Magnetic Windows games have a tool included for installing the game to a hard disk. The current Amiga emulators provide several options to emulate a hard disk,
most notably an image file, very similiar to the floppy disk image file, and simply mounting a directory in your native OS as a hard disk. You can start the
installation tool with the command "install-hd" in the game selection screen. Unortunately the tool doesn't work well with most Amiga emulators I tested
and it doesn't work with FS-UAE, neither. When the tool is started it tries to detect the free space on the target hard disk and for some reason this doesn't work.
It reports either 0k or -1k available, both for hard disk image files and mounted directories. So the tool refuses to install. I cannot say whether this is a limitation
of the emulator or some special code in the installer tool. Anyway, it seems there is no immediate workaround for FS-UAE
It is possible to run the hd install with the latest version of the now discontinued E-UAE (8.29-WIP4) and a small trick. E-UAE also supports mounting a native directory
as hard disk and the emulator reports back the actual free space on the native drive. Considering the GB or TB you have on modern computers, the free space that is reported
to the installer is way too large and causes number overflows. To circumvent this problem, I created a writable dmg file under OSX with the size of 20MB (yes, MB!) and
mounted a directory from this image file and then indeed, the installer tool gets the correct free space on the image file. Unfortunately this little trick doesn't work
with FS-UAE, but to make it less painfull, you can find archive files containing the installed hard disk files for easy mounting in FS-UAE.
To get Wonderland running from hard disk, do the following (the Collection works accordingly):
First choose one of the following packages and download it to your (native) hard disk. Wonderland and the Collection know four game modes with different resolution and colour depth:
1 Low Res with 16 colours: Wonderland Mode 1 Collection Mode 1
2 Med Res with 4 colours: Wonderland Mode 2 Collection Mode 2
3 Hi Res with 16 colours (interlaced): Wonderland Mode 3 Collection Mode 3
4 Hi Res without graphics: Wonderland Mode 4 Collection Mode 4
Note: The installer also offers to store the game graphics compressed or decompressed on the hard disk. All the above archives have the graphics decompressed.
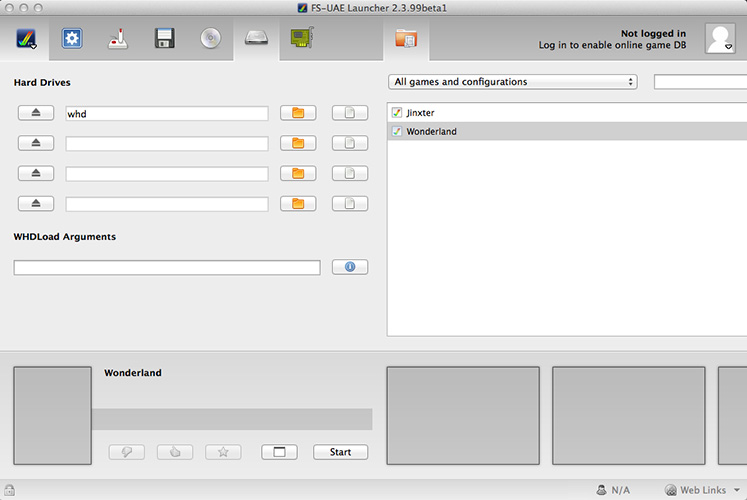
Unzip the archive file to a folder on your hard disk, e.g. the Hard Drives folder in your FS-UAE installation directory. You should then see a folder namned whd
(or chd for the Collection). Then start the FS-UAE-Launcher and open the Hard Drive configuration page. Enter the path - using the small folder icon - to the extracted
whd folder for the first hard disk:
Next move to the Main configuration page and insert a Workbench floppy disk image into the first floppy drive. Please make sure that your selected Kickstart ROM and the Workbench disk share the same version - here probably 1.3x. If you have the Amiga Forever collection you find the Workbench disks in the "Amiga Files" > "Shared" > "adf" folder:

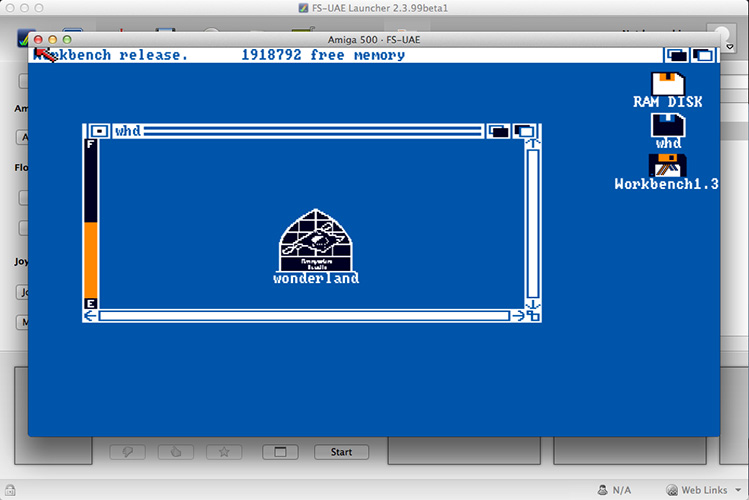
Save your configuration, start the emulator and wait until it has booted to the Workbench screen. You should see a hard disk icon named whd there:

Double-click the whd icon. This should open a windows containing the Wonderland icon:
Double-click the wonderland iconand there you are:

The archives provided above are configured to run on device dh0. However, if you want to run the game from a different HD or move the game to a different folder,
it is easy to adapt: All you need to do is opening all the files with the extension *.rdf in a text editor and change the path names.
If you want to run the game in a game mode other than the one you downloaded, there is no need to download a new archive and go through all the
configuration stuff, again. Instead you can open the file args located in the Wonderland folder in a text editor and simply replace the number with your new choice.